Total Novice Need Help Trying to Light APC Key25 LEDs

deeploveband

2016-10-03 21:41:40

So...

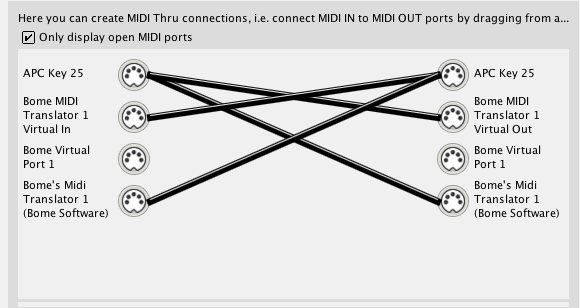
I'm using an Akai APC Key25 with Ableton Live 9 and I'm trying to customize the APC for my live set. I know things similar have been covered but not exact and I'm so new to this I am struggling and need some help badly.

I have midi mapped the clip launch buttons to various functions in ableton, like looper functions, device on/off etc, and I would like to program the LEDs functioning to match certain mappings.

I have learned how to get the button LED to turn on by doing this

Incoming: 90 20 7F
Outgoing: 90 20 01

But when you push the button, it sends a note on and note off message, so the LED stays on and pushing it again does nothing. That makes me think the button is acting as a momentary button. But in ableton, when I have it mapped to device on/off, it toggles the on/off, so it seems to function as a toggle button in ableton.... I want to make the button function as a toggle with the LED as well.

I want to figure out how to get the button to turn off when I push it again. Or change colors when I push it again. Or match certain things that I am doing in ableton - like turn red if I am recording with the looper, turn green when I start playback, and turn amber in overdub... That being said if i can even just at a minimum get the lights to toggle on and off I would be happy.


The problem is I don't understand rules at all, and I don't really know how to go about understanding them. Every post I have found related to this starts from knowledge that I don't have.

I apologize for the extreme novice and I will be hugely indebted to anyone that is willing to take the time to help me begin to understand this programming and walk me through this.

Thank you,

Jacob

florian

2016-10-04 10:01:44

Hi deeploveband,
thanks for your polite posting. I believe most users had been at this point once, and it took them some time before it "clicked"... And actually, having successfully mapped some buttons means that you've already mastered some steps!

Explaining how Rules work is somewhat abstract if you've never dealt with programming languages. In general, Rules are minimal statments, one per line. Variables are containers for specific values. To assign them a value, write the value, followed by an equals sign and the value you want it to have. So I can write "g0=10" and from now on, the variable g0 has the value 10. You can now send, e.g., a MIDI message "Note On, note 40, velocity g0" and it will send a note with velocity 10. Also useful are arithmetic operators: g4=g0+100. Sending "Control Change #20, value g4" will send a CC#20 with value 110. One more useful Rule is the comparison with "IF":
if g4==100 then g0=0
This will set the variable g0 to 0 only if g4 has the value 100. For comparison, you can use equals "==", does not equal "!=", smaller than "<" (or equals "<="), greater than ">" (or equals ">=").

Now with this crash course, you're all set for creating a rule for this toggle button LED feedback. The idea is to use a variable (g0) to have the value 0 when the toggle button is off, and assign it 1 when the toggle button is on. Variables starting with g (and h, i, j...) are global variables in MT Pro, so they keep their value for as long as the project file is loaded. You need to use different global variables for each button you want to define as a toggle button.

Now here is the first attempt of creating the toggle button:

Code: Select all

Incoming: MIDI Note On, Channel 1, Note 32, Velocity 127
Rules:
 if g0==0 then pp=1
 if g0==1 then pp=0
 g0=pp
Outgoing: MIDI Note On, Channel 1, Note 32, Velocity g0
(assuming that sending Note On, Channel 1, Note 32, Velocity 0 (90 20 00) will turn off the LED).
These rules use a temporary (local) variable pp to hold the new value of g0.

The effect is when you first press the button with Note On, Channel 1, Note 32, Velocity 127 (90 20 7F), g0 has the value 0 (all global variables are initialized with 0 when you load a project file), so the first rule line will set pp to 1. The next IF statement will not execute (because g0 is 0). The third line will set g0 to the new value of pp, i.e. 1. Consequently, in the outgoing action, the translator sends Note On, Channel 1, Note 32, Velocity 1 (90 20 01) -- turning on the LED.

Now when you press the button again, the rules are executed again. This time, the first IF statement does not execute, but the second, setting pp to 0, and subsequently also g0 to 0. The Outgoing Action will send Note On, Channel 1, Note 32, Velocity 0 (90 20 00) -- turning the LED off.

Now if you think that simply alternating a variable from 0 to 1 and vice versa should be simpler than using 3 Rules! And indeed, using a bit of math, there are multiple ways to do that. The simplest is this:

Code: Select all

Incoming: MIDI Note On, Channel 1, Note 32, Velocity 127
Rules:
 g0=1-g0
Outgoing: MIDI Note On, Channel 1, Note 32, Velocity g0
At first, it'll look suspicious, but when you try it out with actual values, it works.

For developing and testing Rules, always use the Log Window (from the View menu). When you have checked "Rules" in the Log Window, it will tell you exactly which Rules lines are executed and which variable is assigned which value. That makes it relatively easy to spot problems in your Rules. And it also serves to verify that the Rules do what they're supposed to do.

And remember: if you create translators for other buttons, make sure to use a different global variable for each button.

Hope this will work for you... please report back on your progress. If you've created a project file you like, please post on these forums!
Florian

deeploveband

2016-10-04 18:10:51

Awesome! Thank you SO much Florian, that is a huge help. I actually understand what you did there, which is nice. I know I have a lot more to learn if I want to do some more complex stuff, !74 that's a great start.

If you or anyone else has a chance I have a couple more questions off the top of my head...

1. Is there a way or how would I get the lights to default as "on"? Because I'm going to have button mapped to various parameters in ableton, certain lights I may want to default as on when I open the session, and turn off or change color when say for example I mute the track.

2. And this might relate to 1... how can I get bome to recognize feedback from ableton or is that possible? Basically I have buttons mapped to the looper plugin that I would like to have maybe turn red while recording, amber while in overdub, green while in playback. Maybe that's pretty complex stuff I'm not sure. But I'm sure there are other similar things I will think of wanting to do that seem to have to have some sort of feedback from ableton.

Again thank you so much, even just having a tiny but of knowledge is making this so much more fun and less rip my hair out frustrating hahaha.

Jacob

florian

2016-10-04 21:34:27

1) For initialization, use an incoming action "Preset Change", when current preset is activated. This action will be triggered whenever the project file is loaded (and also when you activate it in the program by checking the "active" checkbox -- or, when it is activated by way of an outgoing preset activation action). Create as many translators as you like with that same incoming action.

2) I guess that Ableton passes MIDI messages back, so you can use translators for that, too... At best, add another preset, where the preset properties select as MIDI INPUT the virtual port to which Ableton is sending.

Florian

deeploveband

2016-10-04 23:49:09

Florian I cannot thank you enough!

I was able to get the preset activation / deactivation to work flawlessly!

I even was able to come up with my own rule to get the lights to default as red, change to green when pressed, and back to red when pressed again, etc. Except when I ran with Ableton I created some sort of infinite loop. I would like the lights to be dependent on the status of certain aspects of Ableton (plugin function statuses, device or speaker on/off stauses, etc.) anyway, so I know I have some more work to do.


I feel like I am (maybe) getting close to having enough of an understanding to achieve the basics of what I would like to achieve. I think I need a little more help on understand the relationship with Ableton though. I am not sure how I would set up my midi preference routing in Ableton, or my I/O in Bome. I have a couple guesses, but could definitely use guidance. After I get the routing set up, I imagine I will need to create a whole new set of translators for the lights that are dependent on incoming messages from Ableton?

I am throwing in a couple screenshots to show what I am working with at the moment as far as I/O goes.

I am so grateful to you for taking the time to help me out with this stuff, I would recommend Bome to anyone, thank you so much!
Attachments
Screen Shot 2016-10-04 at 4.40.31 PM.png
Screen Shot 2016-10-04 at 4.40.31 PM.png (16.1 KiB) Viewed 2169 times
Screen Shot 2016-10-04 at 4.40.51 PM.png
Screen Shot 2016-10-04 at 4.40.51 PM.png (42.64 KiB) Viewed 2169 times
Screen Shot 2016-10-04 at 4.39.20 PM.png
Screen Shot 2016-10-04 at 4.39.20 PM.png (22.13 KiB) Viewed 2169 times

deeploveband

2016-10-04 23:51:25

Just as a quick note for the screenshots... I am just not sure what input to set for my preset that will give me the proper incoming messages from Ableton. And what midi preferences I need to have activated and I/Os I need to connected or not, to create proper functioning and no infinite loops.

florian

2016-10-10 22:00:31

Hi,
sorry for the late reply. Glad you figured out how to get it to work!

Everything from Ableton comes in on the virtual Bome MIDI Translator 1 port. Note that this port has 2 aliases in your setup: "Bome Virtual Port 1" is an auto-alias created by MIDI Translator. It's the recommended port to use in the routes and in the preset default ports. "Bome's Midi Translator 1 (Bome Software)" seems to be some kind of legacy port alias. I recommend to change your setup like this:
Delete all your MIDI Routes, then set up these 2 MIDI Routes:

Code: Select all

APC 25 IN -->  Bome Virtual Port 1
Bome Virtual Port 1 --> APC 25
Then, for a preset which receives from Ableton, open the Preset Properties, and in there, check "Bome Virtual Port 1" for preset default MIDI IN port.

THanks,
Florian